

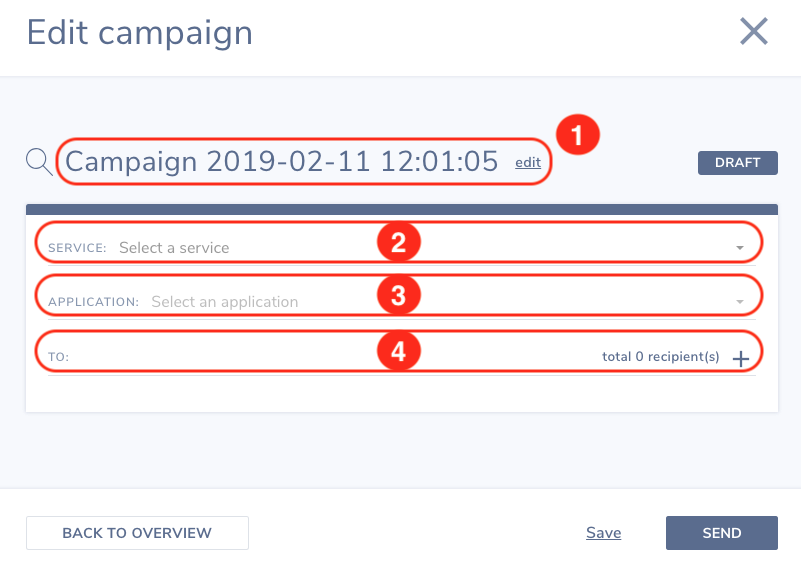
- The campaign name. By clicking the `edit` link you can change the name.
- The service you want to use for this campaign. When you have only one Number Lookup service the system will fill it in automatically.
- The application you want to use for this campaign. When you have for the selected service only application the system will fill it in automatically.
- The mobile numbers for which you want to perform number lookups for. Below we will explain this in more detail.
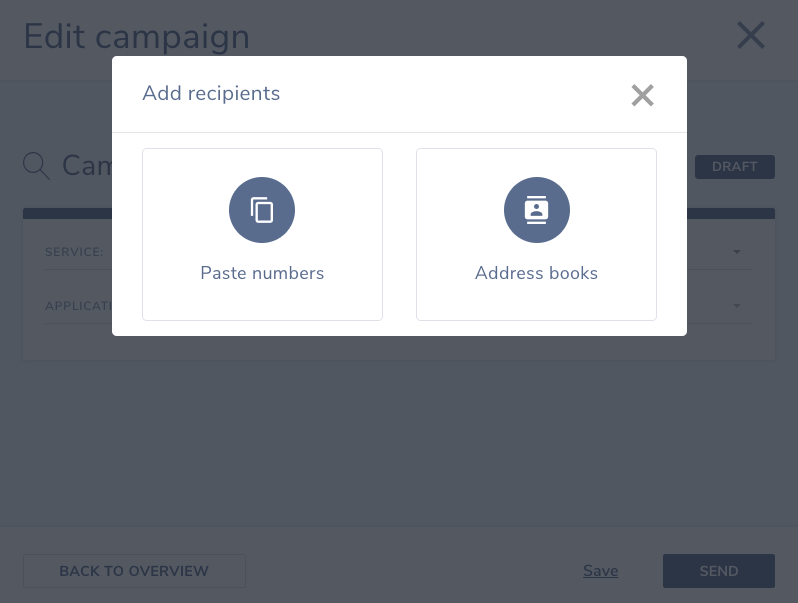
The mobile numbers you want to perform number lookups for can be added in 2 ways. One way is to paste mobile numbers and another way is by selecting an address book. You can add mobile numbers by clicking on the `To` row.
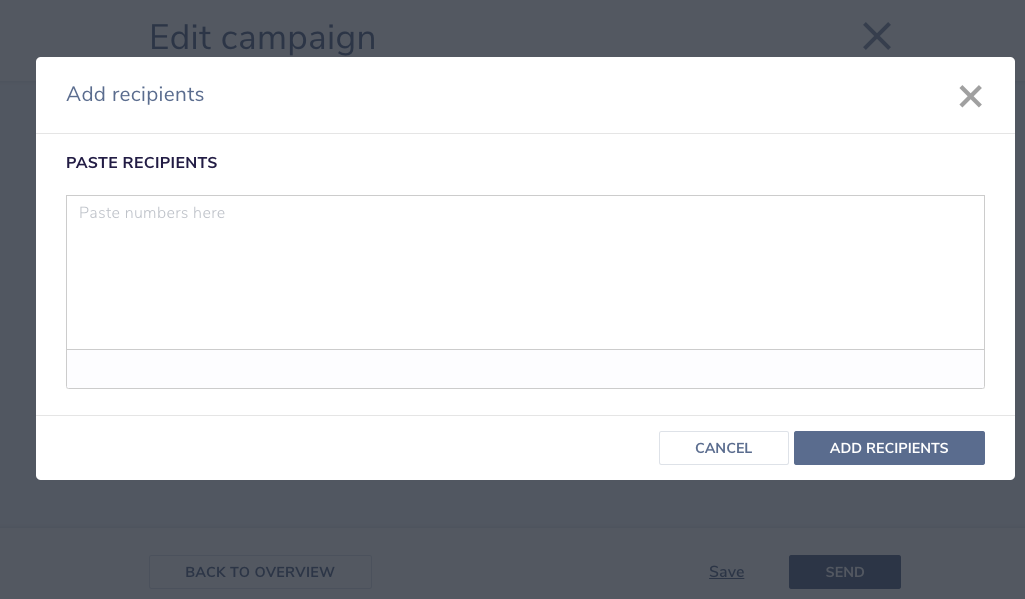
Paste mobile numbers
When you select the option `Paste numbers`, you get a form where you can paste your mobile numbers.

Use contacts in an address book
When you have stored your contacts in an address book, you can add those contacts to the campaign.
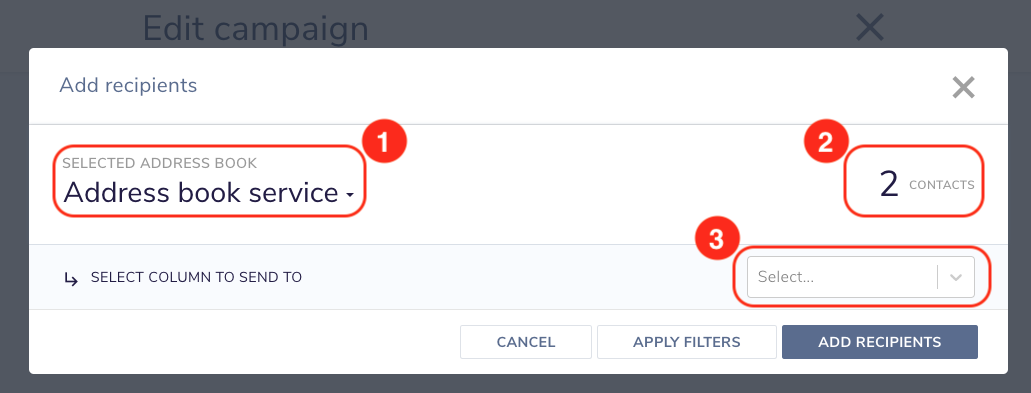
- Select the address book you want to add contacts from.
- The number of found contacts in the address book.
- A contact has multiple mobile number fields, here you can select which mobile number field you want to add to the campaign. When you want to add multiple mobile number types, you have to add them as separate blocks to the campaign.
To add the recipients to the campaign, press the `Add recipients` button. If you do not want to add the complete address book to the campaign, you can add filters by pressing the `Apply filters` button.
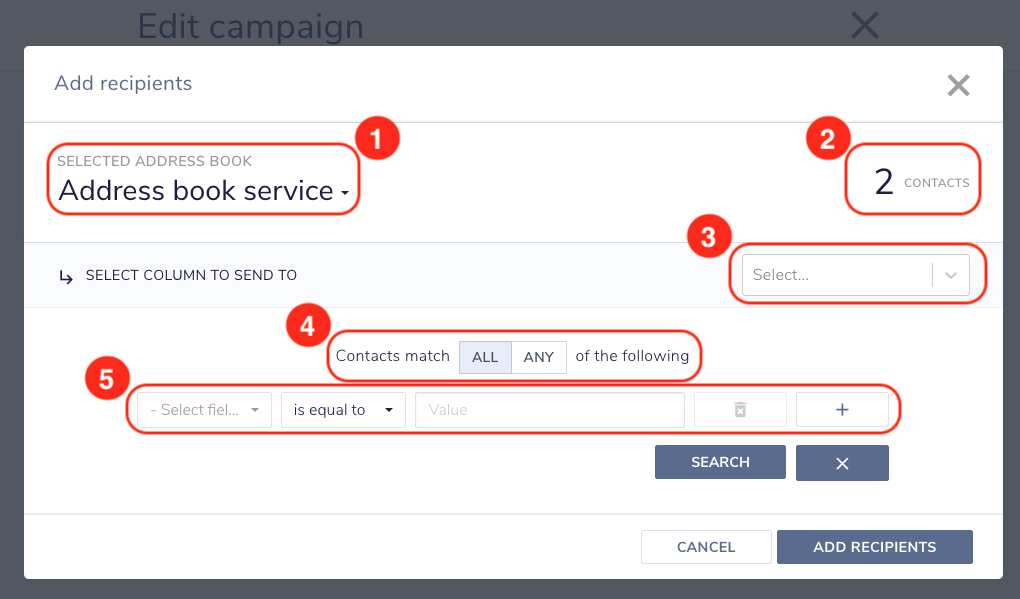
- You can specify if the contacts should match `All` filters or `Any`. With all it means the contact should match each filter and with any it means the contact should match at least one of the filters.
- The filter you want to apply. Per filter you can select the contact attribute you want to filter on, the operator and the value. Example: you can filter for contacts where the first name begins with `Jo`.
When you want to applied filters, you can press the `Search` button to re-calculate the number of found contacts.
Campaign results
When you have added the mobile numbers to your campaign, you can send the campaign by pressing the `Send` button. The system will now start processing your campaign. After a while you can see the results of the campaign.
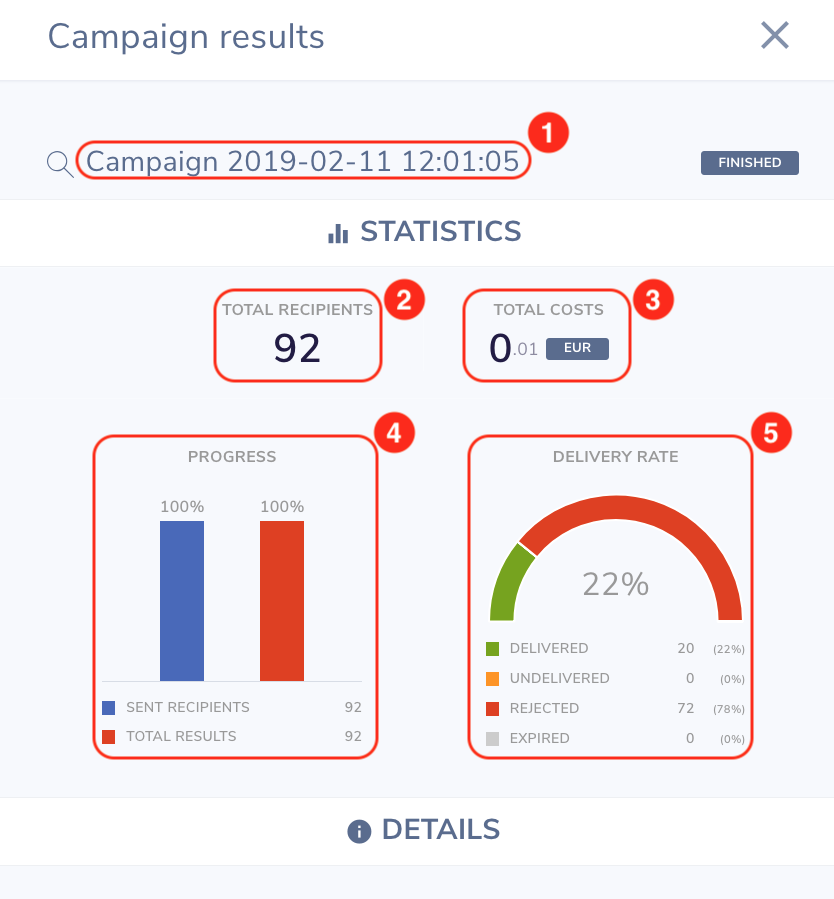
- The name you gave to the campaign.
- The total number of mobile numbers the number lookups are performed for. This might be less than you expected, that’s because the system removes duplicate numbers when you pasted numbers.
- The total costs of your campaign. This is the amount deducted from you wallet.
- The progress sections gives you an impression on the status of your campaign. The `Sent recipients` indicates the number of mobile numbers which are submitted already. When the blue bar is 100% it means all mobile numbers are submitted. The `Total results` indicates the number of results received by the system. When the red bar is 100%, all results are received.
- The delivery section gives you an overview of the results of the campaign. The percentage in the middle shows the percentage of successfully performed number lookups.
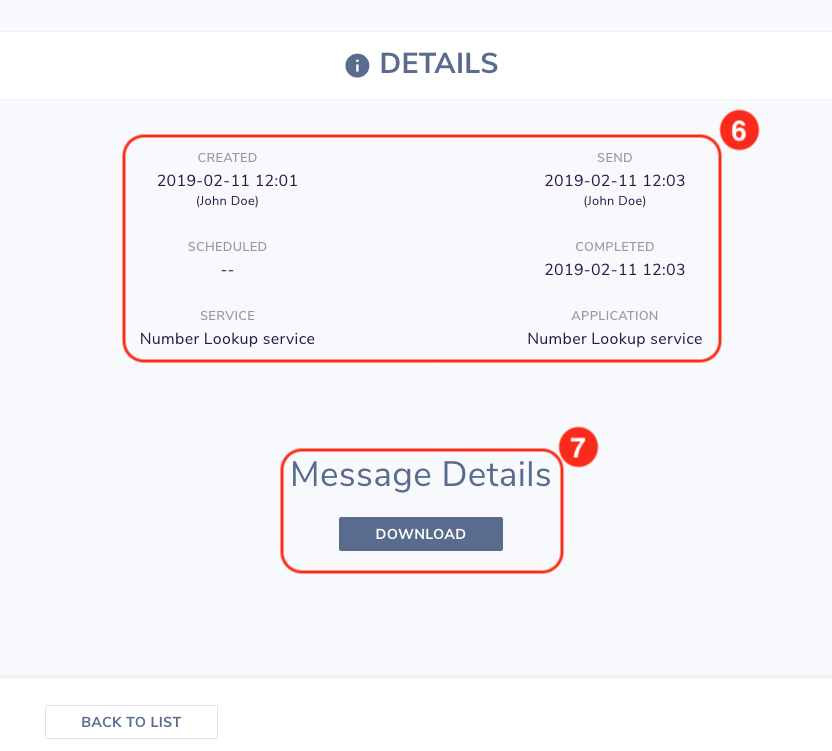
- This section shows information who sent the campaign, when it was submitted and when finished and the service and application used for the campaign.
- When the campaign is finished, you can download the results of the campaign. You can download a CSV file containing all information returned by the API per mobile number.