

To send push messages to your mobile app users with a campaign, you will have to do the following steps:
- First you need to get a push id for each install of a mobile app. See also tutorial `How to send push notifications`.
- Then you have to store the push for a contact in the address book. See also tutorial `Add contacts to your address book`
- Create a campaign. See below how to do that.
In this tutorial we will focus on the campaign module in the Mobile Communicator and assume you already added contacts in the address book with push id’s.
To start a new Push campaign, go to the campaigns page, click on the `New campaign` button.
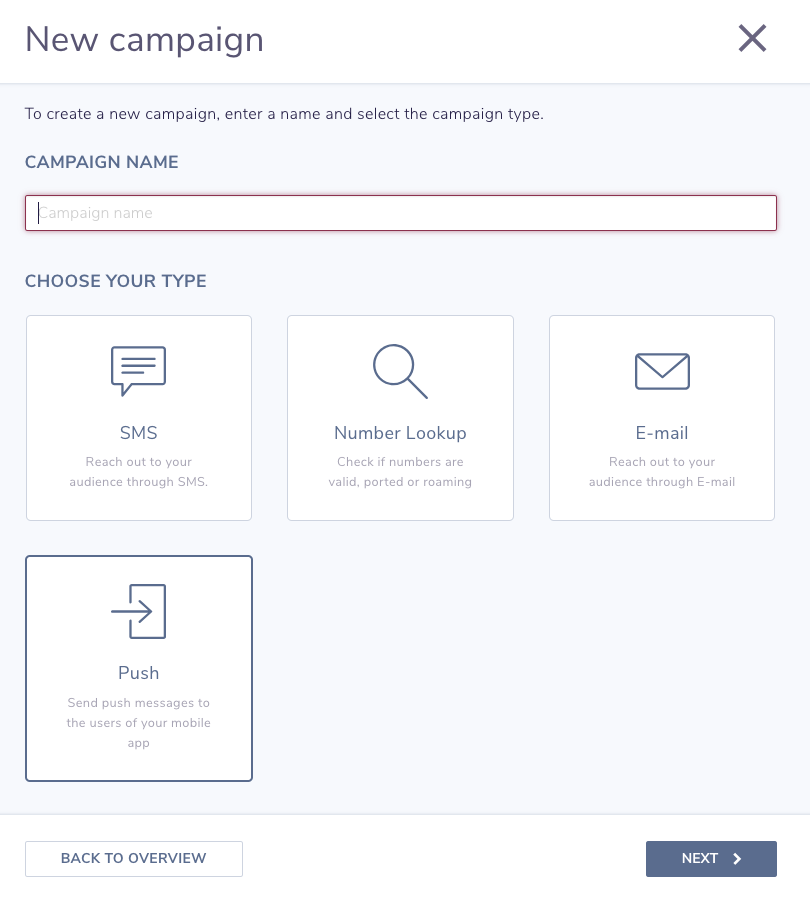

- The campaign name. By clicking on it you can change the name.
- The service you want to use for this campaign. When you have only one Push service the system will fill it in automatically.
- The contacts you want to send the campaign to. See below `Recipients` where we will explain this in more detail.
- The data you are going to send with the campaign needs to be valid JSON data. Our editor helps you to write valid JSON data. When it is valid you will see a green check mark. When you JSON data is invalid you will see a red bar with a description of the error to help you to solve the issue. What exact data you need to send, depends on what your mobile app expects. Example data: {“message”:”Hello world!”,”year”:”2019″}
Recipients
To add recipients to your campaign, click on the `To` row. You can then add contacts from one of your address books to the campaign.
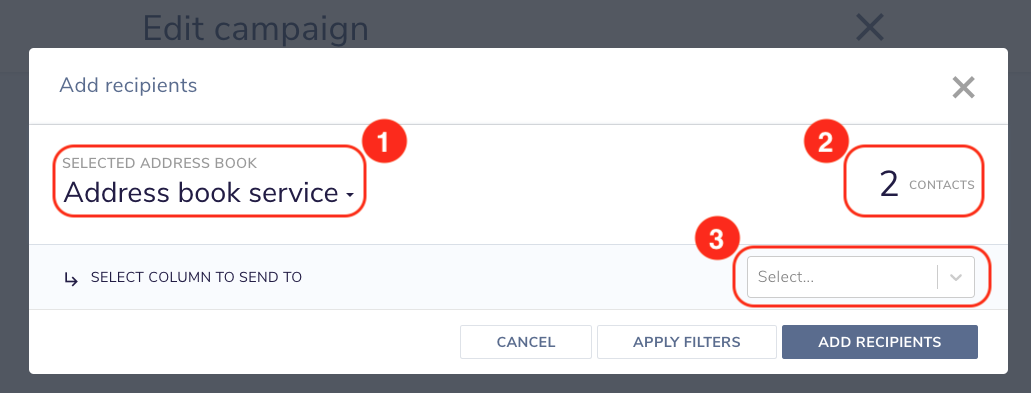
- Select the address book you want to add contacts from.
- The number of found contacts in the address book.
- A contact can have multiple push id fields, here you can select which push id field you want to add to the campaign. When you want to add multiple push id fields, you have to add them as separate blocks to the campaign.
To add the recipients to the campaign, press the `Add recipients` button. If you do not want to add the complete address book to the campaign, you can add filters by pressing the `Apply filters` button.
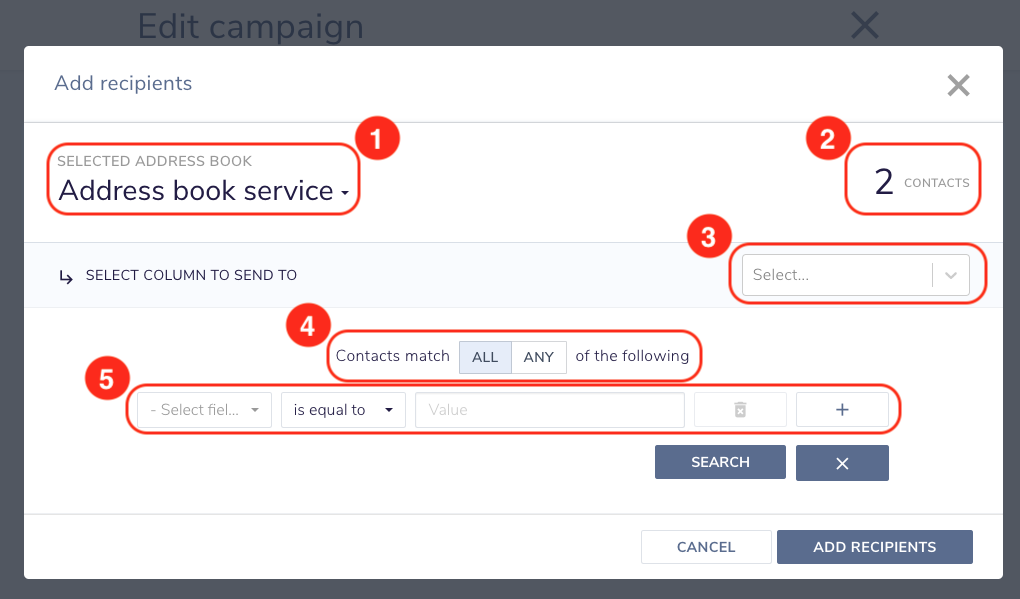
- You can specify if the contacts should match `All` filters or `Any`. With all it means the contact should match each filter and with any it means the contact should match at least one of the filters.
- The filter you want to apply. Per filter you can select the contact attribute you want to filter on, the operator and the value. Example: you can filter for contacts where the first name begins with `Jo`.
When you want to applied filters, you can press the `Search` button to re-calculate the number of found contacts.
Campaign results
When you have added the contacts to your campaign, you can send the campaign by pressing the `Send` button. The system will now start processing your campaign. After a while you can see the results of the campaign.
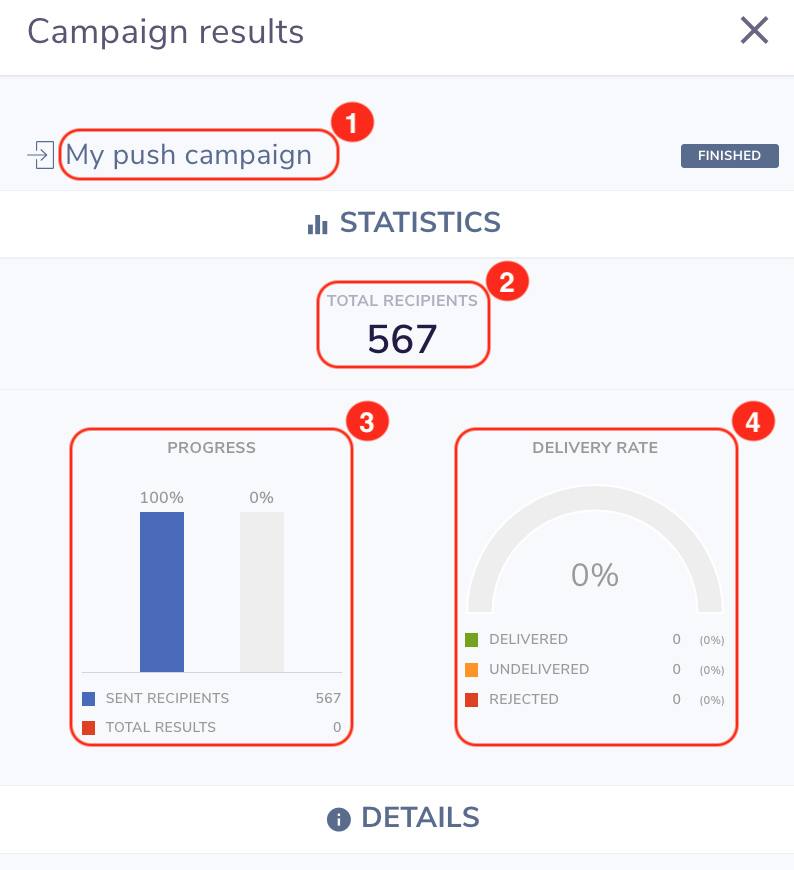
- The name you gave to the campaign.
- The total number of contacts the Push campaign will be send to. This might be less than you expected, that’s because the system detected no push id is filled in for some contacts.
- The progress sections gives you an impression on the status of your campaign. The `Sent recipients` indicates the number of contact which are submitted already. When the blue bar is 100% it means all mobile numbers are submitted. The `Total results` indicates the number of results received by the system. When the red bar is 100%, all results are received.
- The delivery section gives you an overview of the results of the campaign. The percentage in the middle shows the percentage of successfully delivered Push messages.
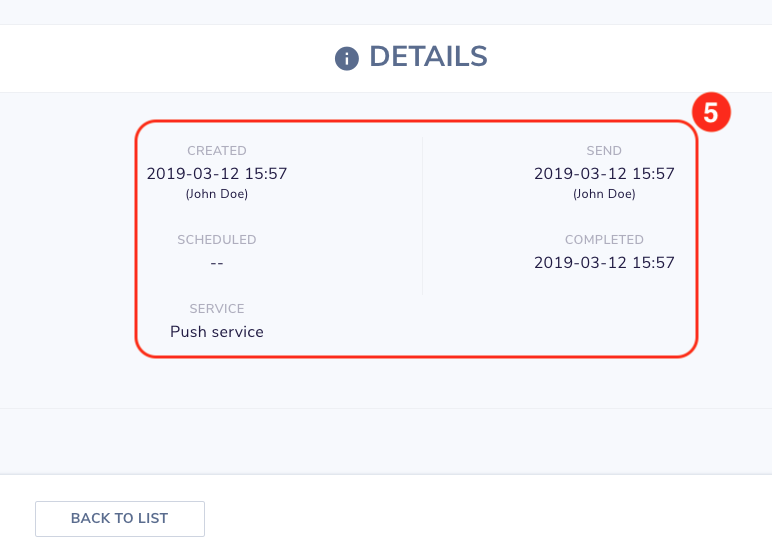
- This section shows information who sent the campaign, when it was submitted and when finished and the service and application used for the campaign.
Note: the delivery results are only filled when your mobile app confirms receiving the push messages. This feature is however not supported yet by our API.